【Xcode】文字入力できるTableViewCellサンプル
最近仕事でTableViewCellをタップするとそのままセル上で入力できるというUIを作りました。よくあるUIですが、そういえば3年程前にも作ろうとして、その時はやり方がわからず諦めたなぁ…。いつの間にか自力で作れるようになっていて、成長してるんだなと少し嬉しくなりました。
また使うこともあるかもしれないので作り方をまとめてみました。
Xcode7、Swift、Storyboard使用です。
画面を作成
1. まず File > New > Project > Single View Application で空のアプリケーションを作ります。
2. Main.storyboardでViewControllerにUITableViewを置きます。
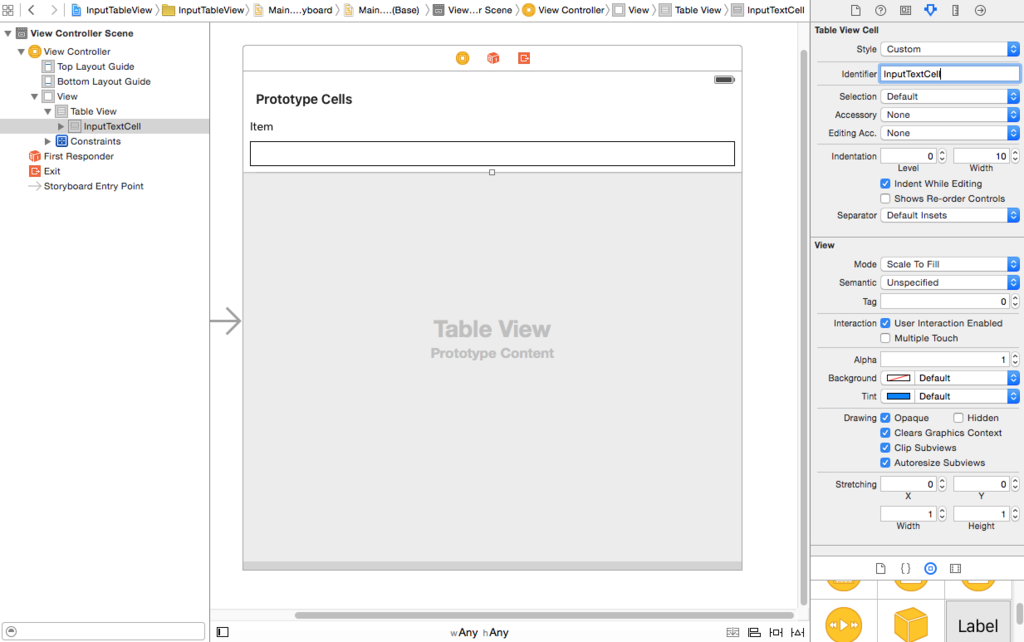
UITableViewにUITableViewCell(Cell内にUILabelとUITextField)を配置します。
セルのIdentifierは「InputTextCell」としました。

TableViewとTextFieldのDelegateを設定
3. TableViewのdelegateとdatasourceはViewControllerに繋ぎます。ひとまずこんな感じ。
class ViewController: UIViewController, UITableViewDataSource, UITableViewDelegate {

    override func viewDidLoad() {
        super.viewDidLoad()
    }

    override func didReceiveMemoryWarning() {
        super.didReceiveMemoryWarning()
    }

// MARK: - UITableViewDataSource
    func tableView(tableView: UITableView, numberOfRowsInSection section: Int) -> Int  {
        return 10;
    }

    func tableView(tableView: UITableView, cellForRowAtIndexPath indexPath: NSIndexPath) -> UITableViewCell {
        let cell: InputTextTableCell = tableView.dequeueReusableCellWithIdentifier("InputTextCell", forIndexPath: indexPath) as! InputTextTableCell
        return cell
    }

// MARK: - UITableViewDelegate
    func tableView(tableView: UITableView, heightForRowAtIndexPath indexPath: NSIndexPath) -> CGFloat {
        return InputTextTableCell.height()
    }
}
4. File > New > File でカスタムセルのクラスを作ります。今回は「InputTextTableCell」にしておきます。
UITextFieldDelegateはこのクラスに設定します。Returnキータップ時にキーボードを消す処理を入れました。
class InputTextTableCell: UITableViewCell, UITextFieldDelegate {

    override func awakeFromNib() {
        super.awakeFromNib()
    }

    override func setSelected(selected: Bool, animated: Bool) {
        super.setSelected(selected, animated: animated)
    }

     static func height() -> CGFloat {
        return 75.0
    }

// MARK: - UITextFieldDelegate
    internal func textFieldShouldReturn(textField: UITextField) -> Bool {
        textField.resignFirstResponder()
        return true
    }
}
カスタムDelegateを作成
5. セルでテキスト入力が終わった時にViewControllerに通知するため、カスタムDelegateを作成します。
InputTextTableCell.swiftに下記を追加します。
import UIKit

// 追加
protocol InputTextTableCellDelegate {
    func textFieldDidEndEditing(cell: InputTextTableCell, value: NSString) -> ()
}

class InputTextTableCell: UITableViewCell, UITextFieldDelegate {
    var delegate: InputTextTableCellDelegate! = nil

    (中略)

    // 追加
    internal func textFieldDidEndEditing(textField: UITextField) {
        self.delegate.textFieldDidEndEditing(self, value: textField.text!)
    }
}
6. ViewController.swiftでInputTextTableCellDelegateを実装します。以下のように追加・変更してください。
編集されたセルのindexPathを取得するのに tableView.indexPathForRowAtPoint() を使用するのがポイントです。tableView.indexPathForCell の方がよく使われていると思いますが、このメソッドだと編集中のセルがスクロールされて画面外にいる場合にnilが返ってきてエラーになることがあるため、ここでは使用を避けています。
// InputTextTableCellDelegate追加
class ViewController: UIViewController, UITableViewDataSource, UITableViewDelegate, InputTextTableCellDelegate {

    // 追加
    @IBOutlet weak var tableView: UITableView!

    (中略)

    func tableView(tableView: UITableView, cellForRowAtIndexPath indexPath: NSIndexPath) -> UITableViewCell {
        let cell: InputTextTableCell = tableView.dequeueReusableCellWithIdentifier("InputTextCell", forIndexPath: indexPath) as! InputTextTableCell
        // delegate設定
        cell.delegate = self
        return cell
    }

// 追加
// MARK: - InputTextTableCellDelegate
    func textFieldDidEndEditing(cell: InputTextTableCell, value: NSString) -> () {
        let path = tableView.indexPathForRowAtPoint(cell.convertPoint(cell.bounds.origin, toView: tableView))
        NSLog("row = %d, value = %@", path!.row, value)
    }
}
これでセルのTextFieldから文字を入力し、入力が終わったらTableViewを管理するViewController側に値を渡すことができるようになりました。
あとは適宜自分のプロジェクトに合わせてデータの表示、保存処理を追加してみてください。
UITextField以外にもボタン、ロングタップなどでも同じようにできます。